源码编译需要很多的库的支持,一种是基础的库,一种是你需要的编解码信息的库
一,ffmpeg源码的下载
在git上找个你需要的版本的库,直接通过git下载
git clone https://github.com/FFmpeg/FFmpeg.git

ffmpeg 版本 ffmpeg version n4.1.1-3-g53f3f52
cuda 版本 CUDA Version 10.0.130(这个版本自带驱动,可以不用安装驱动)
drive 驱动版本 Driver Version: 410.48
nv-codec-headers 版本 sdk/8.1二,基础环境的准备
yum -y install autoconf automake freetype-devel gcc gcc-c++ git libtool make nasm pkgconfig zlib-devel bzip2 bzip2-devel三,编码过程
1,设置环境路径
在 /etc/profile 文件中,设置 PKG_CONFIG_PATH 路径
vim /etc/profile
export PKG_CONFIG_PATH=/usr/local/lib64/pkgconfig:/usr/lib64/pkgconfig:/usr/local/lib/pkgconfig:/usr/lib/pkgconfig2,编码
配置好configure之后,通过make可以一步步试探你缺少的库是什么,然后在下载,编译
下载完之后,通过命令来配置你需要的东西 ./configure --help
make 编译的常用命令
./configure
make -j 10 (编译,并行10个核来一起编译,可以取消)
make install (安装)
make disclean (卸载)
make clean (清除编译)3,解决gnutls的问题

我们需要手动的安装gnutls,gnutls3.5.19版本的可以,大于这个版本的有问题,
http://www.linuxfromscratch.org/blfs/view/svn/postlfs/gnutls.html
有安装的方法
1,安装gnutls需要先安装gnutls,所有先手动下载这个
wget https://ftp.gnu.org/gnu/nettle/nettle-3.1.1.tar.gz
tar zxf nettle-3.1.1.tar.gz
./configure --enable-shared
make
make install
2,安装gnutls
wget https://www.gnupg.org/ftp/gcrypt/gnutls/v3.5/gnutls-3.5.19.tar.xz
xz  -d gnutls-3.5.19.tar.xz
tar xf gnutls-3.5.19.tar
cd gnutls-3.5.19
./configure --enable-shared
make
make install在安装gnutls时,我们使用./configure --enable-shared时,可能遇到以下的问题;
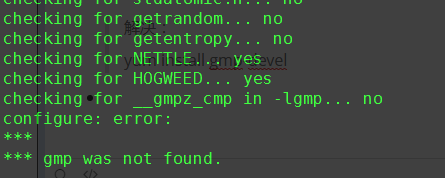
解决:
yum install gmp-devel

解决:
yum install libffi libffi-devel
./configure --enable-shared --with-included-libtasn1

解决:
yum install libunistring-devel
./configure --enable-shared --with-included-libtasn1 --with-included-unistring

解决:
yum install p11-kit-devel
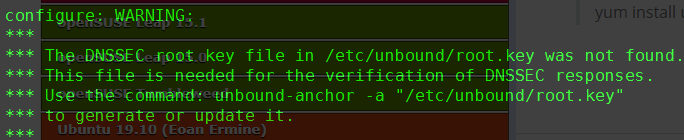
yum install unbound unbound-devel unbound-libs
./configure --enable-shared --with-included-libtasn1 --with-included-unistring
4,解决ladspa.h的问题

yum install ladspa*5,解决libass的问题

yum install libass*6,解决libdc1394-2的问题
1,官网下载源码
https://sourceforge.net/projects/libdc1394/files/libdc1394-2/
2,编译
./configure
make
make install7,解决libgsm的问题

yum install gsm-tools gsm-devel8,解决libmp3lame版本的问题

源码安装,地址
git clone https://github.com/gypified/libmp3lame.git
./configure
make
make install9,解决libopencore_amrnb的问题

官网下载源码,再手动编译
https://sourceforge.net/projects/opencore-amr/files/opencore-amr/
 ./configure
 make
make install10,解决opencv的问题
11,解决openh264的问题

从git上下载源码
git clone https://github.com/cisco/openh264
如果下载失败,则直接下载zip包,然后解压安装
make ARCH=x86_64
make install12,解决libopenjp2版本的问题

git下载源码来编译安装
git clone https://github.com/uclouvain/openjpeg.git
如果下载不下来,则下载zip包解压安装
unzip openjpeg-master.zip
cmake 安装
mkdir build
cd build
cmake .. -DCMAKE_BUILD_TYPE=Release
make -j 10
make install13,解决opus的问题

#需要手动的下载安装
https://ftp.osuosl.org/pub/xiph/releases/opus/
#安装步骤
wget http://downloads.xiph.org/releases/opus/opus-1.2.1.tar.gz
tar -zxvf opus-1.2.1.tar.gz
cd opus-1.2.1
./configure
make
make install
#注意:如果pkg_config没有找到,需要手动的设置路径,见前面PKG_CONFIG_PATH路径的设置,如果设置好之后,库也存在还是不行,则要检查是否使用yum下载了低版本的,若是则删除
yum remove opus-1.0.2-6.el7.x86_64 opus-tools-0.1.6-1.el7.x86_64 opusfile-0.5-1.el7.x86_64 opus-devel-1.0.2-6.el7.x86_64 opusfile-devel-0.5-1.el7.x86_6414,解决libpulse的问题
15,解决libsoxr的问题

#手动下载包,然后编译安装
https://sourceforge.net/projects/soxr/files/
tar -xvf soxr-0.1.3-Source.tar
./go
cd Realse
make install在执行go的时候可能遇到这个问题,则需要下载cmake高级版本

# cmake 安装
https://cmake.org/download/
tar -zxvf cmake-3.13.0-rc1.tar.gz
./configure
make
make install16,解决speex的问题

##手动下载安装包,编译,选择 libspeex下载
https://xiph.org/downloads/
./configure  --enable-shared
make
make install17,解决libtheora的问题

## 手动下载安装包,编译,选择libtheora下载
https://xiph.org/downloads/
unzip libtheora-1.1.1.zip
./configure
make
make install在configure的过程中,可能error,则我们需要下载安装这个

yum install libogg*18,解决libv412的问题
19,解决vorbis的问题

git clone https://github.com/xiph/vorbis.git
./autogen.sh
./configure  --enable-shared
make
make install20,解决libx264的问题

git clone --depth 1 http://git.videolan.org/git/x264
./configure --enable-shared
make
make install如果编译时报错,则需要安装nasm
curl -O -L http://www.nasm.us/pub/nasm/releasebuilds/2.13.02/nasm-2.13.02.tar.bz2
tar -xjvf nasm-2.13.02.tar.bz2
cd nasm-2.13.02
./autogen.sh
./configure  --enable-shared
make
make install21,解决libx265的问题

git clone --depth 1 https://github.com/videolan/x265.git
cd x265
cd build
cmake ../source
make
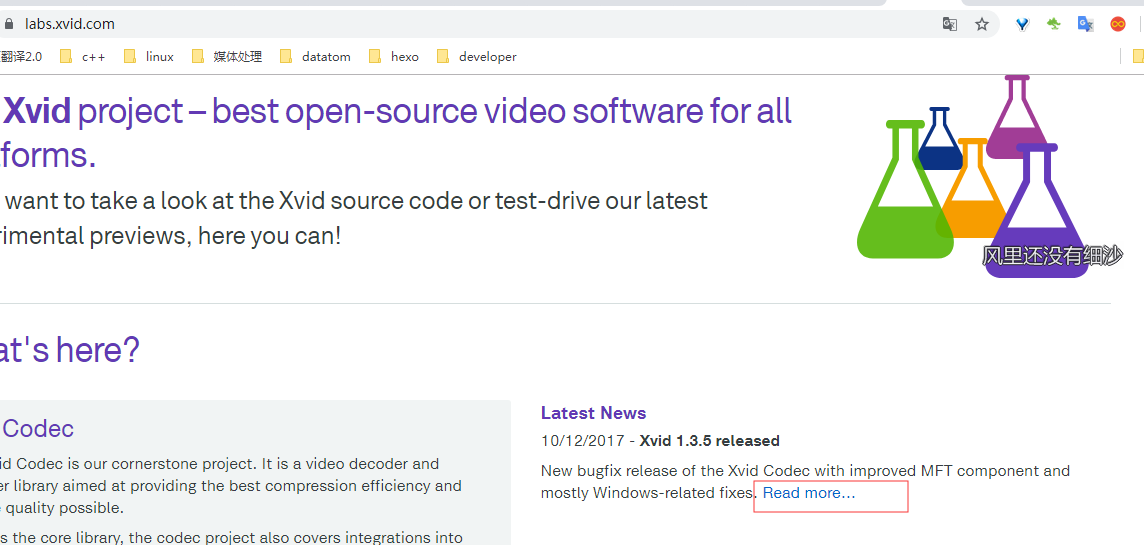
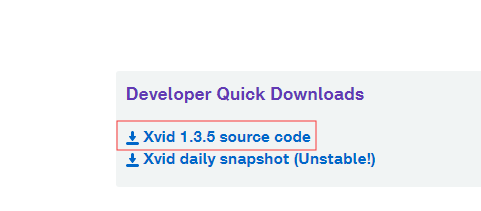
make install22,解决libxvid的问题

##官网下载
https://www.xvid.com/download/
## 按下图过程来查找
## 然后按照README来安装
cd build/generic
./configure
make -j 10

make install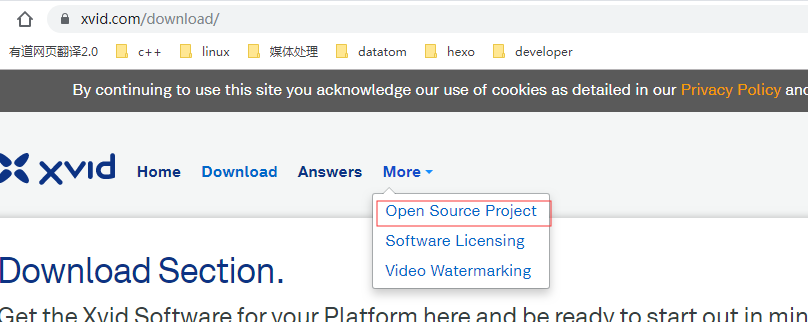
23,解决openal的问题

yum install openal-soft openal-soft-devel24,解决libcdio的问题
25,解决bzlib的问题
26,解决libxcb的问题

yum install libxcb-devel四,添加硬件编解码
1,查看机器上显卡的型号
lspci | grep VGA
2,安装对应显卡的驱动
https://www.nvidia.com/Download/index.aspx?lang=en-us
安装的方法见显卡驱动安装的文档3,重新编译ffmpeg
在./configure时添加以下的选项,来重新编译ffmpeg,既可以驱动显卡
--enable-cuda-sdk \
--enable-cuvid \
--enable-nvenc \
--enable-nonfree \
--enable-libnpp \
--extra-cflags=-I/usr/local/cuda/include \
--extra-ldflags=-L/usr/local/cuda/lib64 \4,查看是否安装成功
使用ffmpeg -hwaccels命令查看支持的硬件加速选项
ffmpeg -hwaccels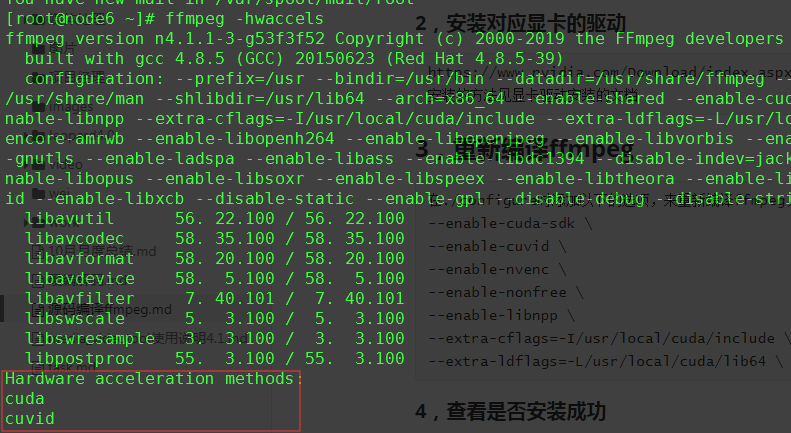
5,查看cuvid提供的GPU编解码器
ffmpeg -codecs | grep cuvid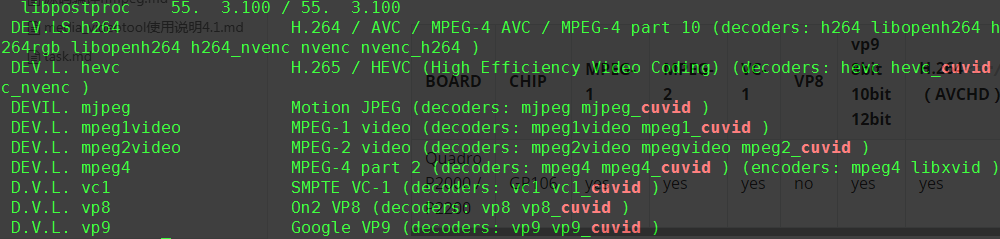
6,使用GPU进行转码
用GPU进行转码的命令和软转码命令不太一样,CPU转码的时候,我们可以依赖ffmpeg识别输入视频的编码格式并选择对应的解码器,但ffmpeg只会自动选择CPU解码器,要让ffmpeg使用GPU解码器,必须先用ffprobe识别出输入视频的编码格式,然后在命令行中指定对应的GPU解码器。
例如,将h264编码的源视频转码为指定尺寸和码率的h264编码视频:
ffmpeg  -hwaccel cuvid -c:v h264_cuvid -i video/video-H264-AAC.mkv -c:v h264_nvenc -b:v 2048k -vf scale_npp=1280:-1 -y /root/transcode.mp4

-hwaccel cuvid:指定使用cuvid硬件加速
-c:v h264_cuvid:使用h264_cuvid进行视频解码
-c:v h264_nvenc:使用h264_nvenc进行视频编码
-vf scale_npp=1280:-1:指定输出视频的宽高,注意,这里和软解码时使用的-vf scale=x:x不一样
转码期间使用nvidia-smi查看显卡状态,能够看到ffmpeg确实是在使用GPU进行转码:如果在执行命令的时候报错,则需要,进行nv-codec-headers和驱动的版本匹配的处理

我开始编译nv-codec-headers使用的是最新版本9.1的,编译出错,有两种方法,一种是升级drive的版本,升级到430以上,这个比较的麻烦,另一种是降低nv-codec-headers的版本,我降低到8.1版本,就可以成功
ffmpeg 版本 ffmpeg version n4.1.1-3-g53f3f52
cuda 版本 CUDA Version 10.0.130(这个版本自带驱动,可以不用安装驱动)
drive 驱动版本 Driver Version: 410.48
nv-codec-headers 版本 sdk/8.17,在容器中使用NVIDIA
在将自己的服务打包成镜像的时候,开始没有设置环境变量,导致怎么都无法调用NVIDIA进行硬件的转码;
最后查询了很多的资料,发现需要添加一个环境变量,在Dockfile中
ENV NVIDIA_DRIVER_CAPABILITIES video,compute,utility
才能保证容器中使用成功8,gpu和cpu转码测试
对于同一个视频,分别采用cpu和GPU两种方式来进行转码,对比这两者之间的效率
#机器信息
逻辑核:24
内存:64G
24  Intel(R) Xeon(R) CPU E5-2620 v2 @ 2.10GHz
系统:CentOS Linux release 7.6.1810 (Core)
#视频信息:
name: 11.mkv
size: 1.1G
Video: h264 (High), yuv420p(progressive), 1280x720 [SAR 1:1 DAR 16:9], 25 fps, 25 tbr, 1k tbn, 50 tbc (default)
Audio: ac3, 48000 Hz, stereo, fltp, 192 kb/s (default)
#软件转码:
[time] ffmpeg  -i video/11.mkv -c:v libx264 -b:v 2048k -vf scale=1280:-1 -y /root/transcode.mp4
#结果
real	11m18.807s
user	180m16.290s
sys		1m36.925s
cpu占用	平均1600%
[time] ./softhw /root/video/11.mkv /opt/nvitra1.mp4
real	14m51.166s
user	220m2.857s
sys		1m21.718s
cpu占用  平均1600%
#硬件转码:
[time] ffmpeg  -hwaccel cuvid -c:v h264_cuvid -i video/11.mkv -c:v h264_nvenc -b:v 2048k -vf scale_npp=1280:-1 -y /root/transcode.mp4
#结果
real	1m45.228s
user	1m15.910s
sys		0m18.734s
cpu占用	平均90%
[time] ./hw /root/video/11.mkv /opt/nvitra.mp4
real	1m29.478s
user	0m22.754s
sys		0m23.465s
cpu占用 50%8,指定显卡进行转码
ffmpeg -hwaccel cuvid -hwaccel_device 0 -c:v h264_cuvid -i <input> -c:v h264_nvenc -b:v 2048k -vf scale_npp=1280:-1 -y <output>

ffmpeg -hwaccel cuvid -hwaccel_device 1 -c:v h264_cuvid -i <input> -c:v h264_nvenc -b:v 2048k -vf scale_npp=1280:-1 -y <output>

ffmpeg -hwaccel cuvid -hwaccel_device 0 -c:v h264_cuvid -i /root/source_media/flv.flv -c:v h264_nvenc -b:v 2048k -vf scale_npp=1280:-1  -y /root/flv.mp4
评论